Roblox is related to gaming. It is a platform that needs no introduction for gamers. But for those who are new need to know. Remember how we all, as children thought of making our games? If not making our game, we have considered modifying the existing one. So in this article, you’ll get complete information about making a shirt on Roblox.
Roblox is the reality of those thoughts of ours. It is not limited to one game or one player. Multiple games can be played among numerous players. Speaking statistically, the average number of people using Roblox monthly is a hundred million. The flexibility offered by Roblox makes it so popular among gamers to make a shirt on Roblox.
See Also: How to Refund a Game on Steam? [Complete Guide]
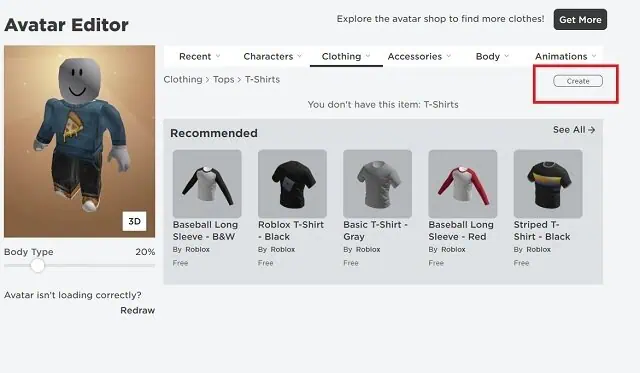
Make A Shirt On Roblox
Here, we will learn to make a shirt on Roblox in steps.
1. Membership
Roblox, like many other gaming platforms, offers membership. This membership is termed Builder’s Club. Having a subscription to the builder’s club is an essential requirement.
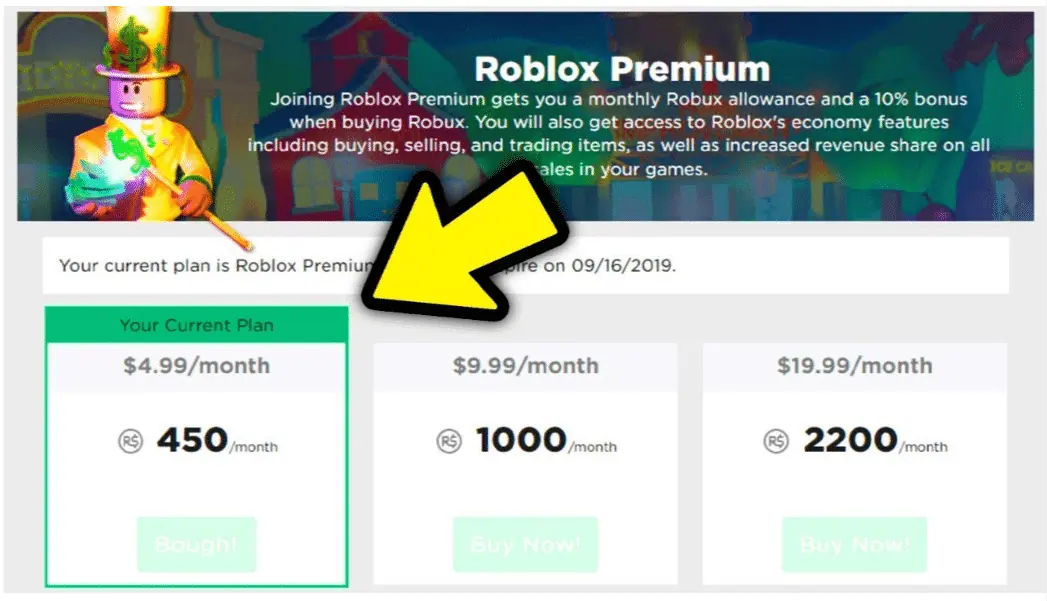
Roblox does not allow the users to upload the designed attire or modification if the user is not a member of the Builder’s Club. If having a subscription already, then this step can be skipped to make a shirt on Roblox. If not, then here is the method to get a subscription.
a. Go to the official website of Roblox and look for the membership option.
b. Select the desired membership. They offer both monthly and annual subscriptions.
c. On the next page, choose the option for payment.
d. After selecting the method, click on continue. Then, fill in the required details regarding the amount.
e. Once the submitted order is clicked, you are ready.
2. Template
Roblox facilitates templates to make a shirt on Roblox. It is through templates that a user can design clothes. A model is a basic sample of something; it is for clothing.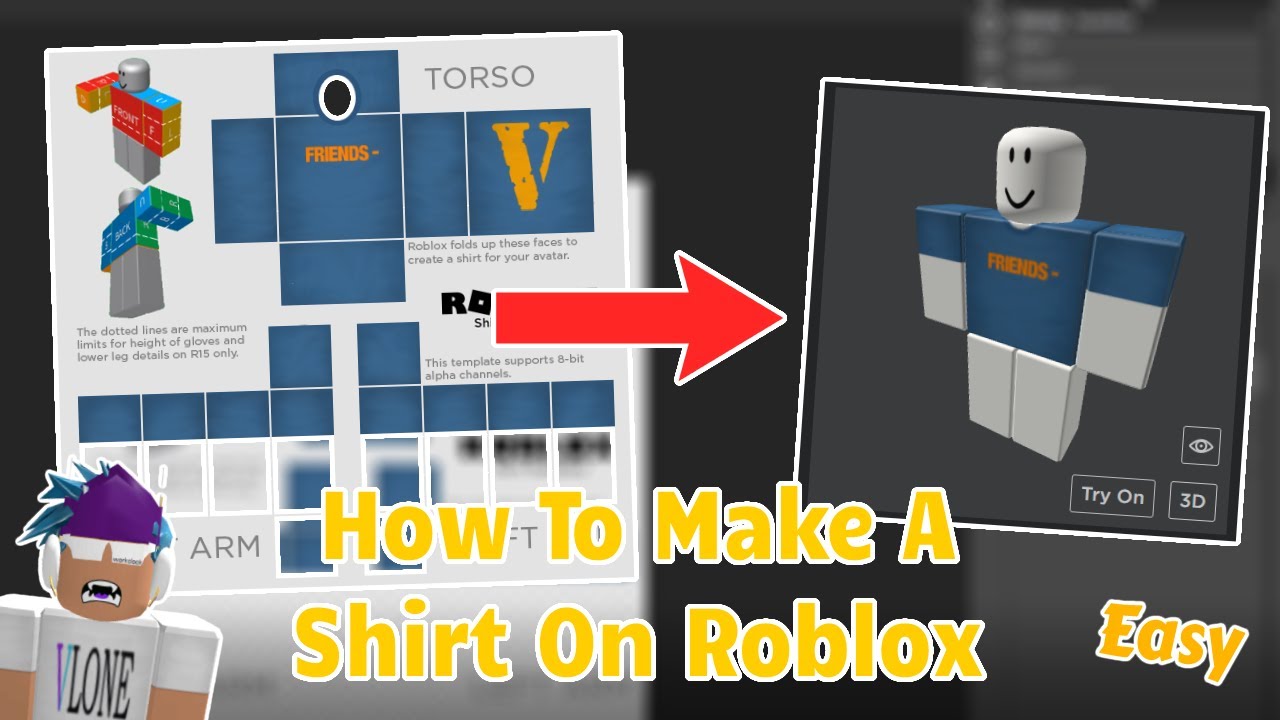
Select the model of your choice. Save this template by right click on it first and then click save as.
See Also: How to Add Grammarly to Word | Simple Effective Guide
3. Editing
The chosen model needs editing. While the default image editing tool of the device may be helpful, it is recommended by Roblox to use either GIMP or NET (getpaint.net). GIMP stands for GNU Image Manipulation Program. Both these apps do not require any money to give access to all features. They are user-friendly too to make a shirt on Roblox.
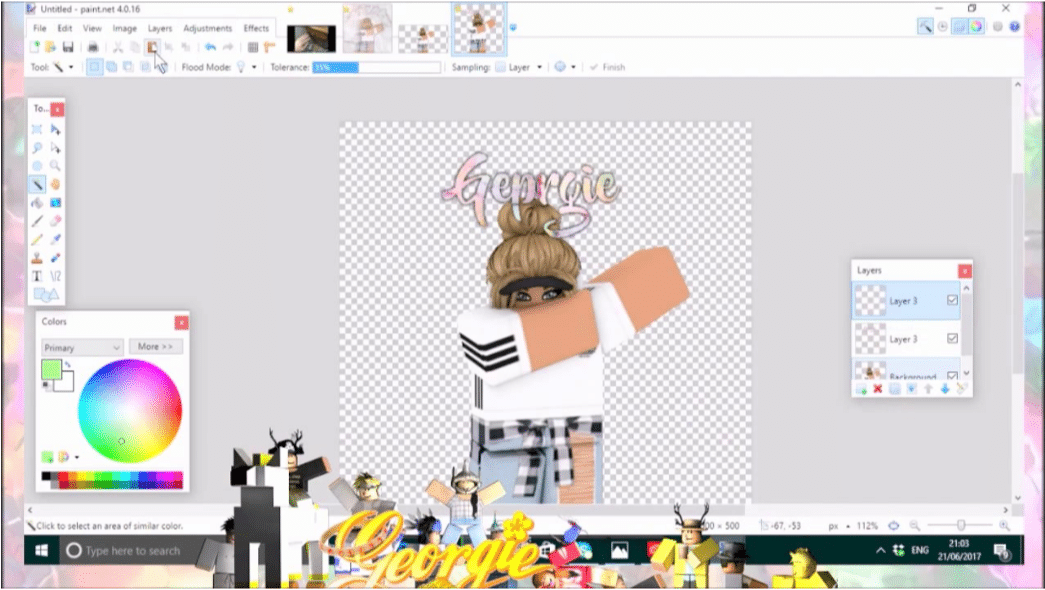
When we edit something, we publish it in flat a view. When we upload it on Roblox, it becomes 3d. It is better to make the shirt on Roblox, keeping this in mind. That makes us believe it is better to use the recommended editing tools to make a shirt on Roblox.
4. Designing
There are no boundaries on colors or designs from Roblox’s side. That implies that one can be as experimental with it as one wants. One can keep it basic or design it on a theme.

Roblox does not mind. Making a shirt is one of the most comfortable and most fun of all the clothes.
See Also: Get Free Roblox Accounts With Robux and Passwords | 7 Ways (2023)
5. Saving
Do not forget to save the edited shirt. Save it with a name different than that of the template. It will make it easier to find it during the process of uploading.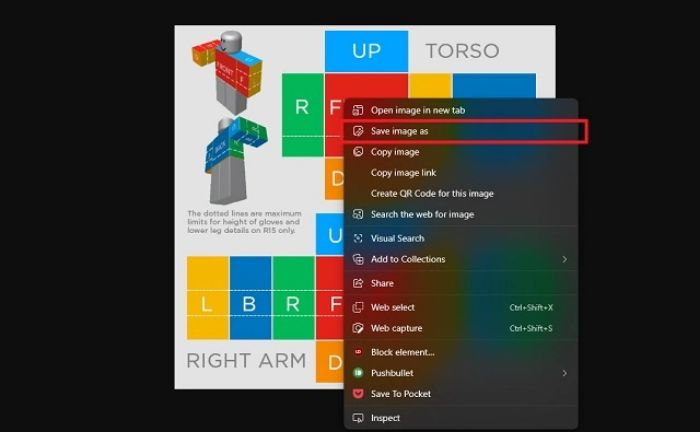
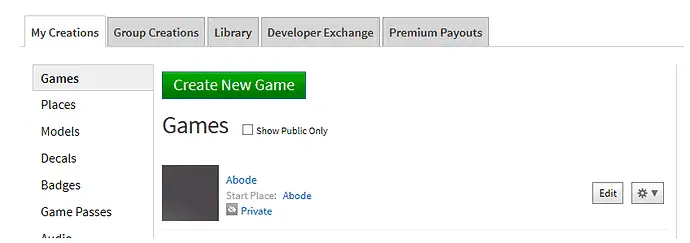
6. Upload
Consider the task undone until the shirt is uploaded on Roblox.  Uploading involves a precise method. Before beginning, log yourself in on Roblox.
Follow This Method
a. Open the website of Roblox on the browser, say Google. Select the option of ‘create’ on the site. You will find it on the top left of the page.
b. You need to click continue on the page that appears next. If you did not log in, you will be asked to log in before proceeding.
c. You will now see an option – My Creations. Under this option, and drop list will appear. One can find shirts quickly by examining the file from the bottom.
d. When you select the options of shirts, the next page will show an option for browsing. You can review your device’s files and find what you want. The browse option will be given at the top of the screen.
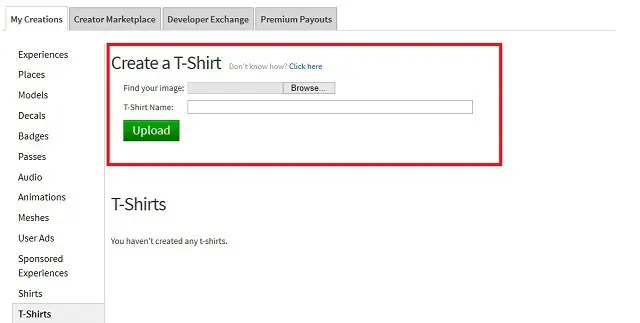
e. On choosing to browse, a new window pops up. Now look for the edited shirt. It is like a normal search process. Typing the name you named your file will also display the result. Double-click on the image when you find it, or click on the open button at the bottom of the window. For ease of looking, save the image on the desktop after editing.
f. Roblox now asks the users to give their shirts a unique name. A column, namely Shirt Name, will display. Enter the desired name in the box. Remember that the name given here is the name that will appear on the web for the shirt. It is the name through which it will sell or purchase.
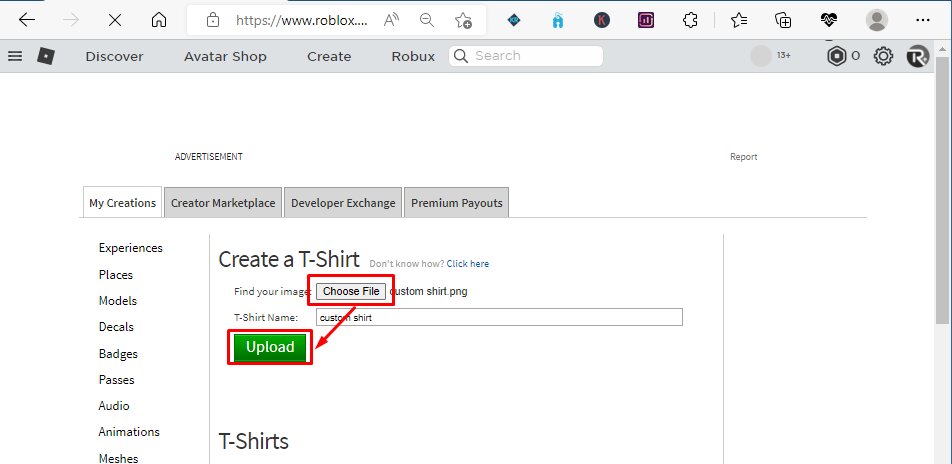
g. This is the last part of the process. A green button, ‘Upload,’ is on the screen’s bottom right. Clicking on this button uploads the designed shirt on Roblox.
See Also: How To Delete Your Roblox Group? Guide 2023
FAQS
How do I create a Roblox account?
To create a Roblox account, go to the Roblox website and click on the 'Sign Up' button. You'll need to provide a username, password, and date of birth.
Can I play Roblox on mobile devices?
Roblox is available on mobile devices through the App Store and Google Play. Users can also access the platform through a web browser.
How do I create my own game on Roblox?
To create your own game on Roblox, you'll need to download and use the Studio software to design and build your game. You can then publish your game to the Roblox platform for others to play.
What is Roblox Studio?
Roblox Studio is a software program allowing users to create and develop games for the platform. It includes a variety of tools and resources for game development.
What are Roblox groups?
Roblox groups are communities of users who share similar interests or play styles. Users can join groups to socialize, participate in events, and play games together.
What are Roblox events?
Roblox events are special occasions where users can participate in unique games and activities. Events often include exclusive prizes or rewards for participants.
Conclusion
Specific queries have kept users confused about making a shirt on Roblox. One of them is whether they can wear the shirt they make. The answer is, of course, they can. Users often go to the wrong address while downloading the editing tools. Additionally, if the editing tools mentioned above are incompatible with the device you use, you can try editing tools like Pixlr. Adobe Photoshop is also an option, but only if an expert. Otherwise, Adobe Photoshop can be difficult.
Before uploading the shirt, try to imagine the look. This helps the users to make better shirts. Shirts that look good in flats lay and 3D (3 dimensions).
I hope the step-by-step method helped you understand how to make a shirt on Roblox. Make your shirt now. Keep coming back to us for similar content as Make a Shirt on Roblox.
See Also: Get Free Roblox Accounts With Robux and Passwords | 7 Ways (2024)
About the Author
Gemma: Staff writer at FreeAccountsOnline, Journalism graduate from Leeds Beckett University. Covers breaking news, reviews, including world’s worst Steam games.
Discover more from FreeAccountsOnline
Subscribe to get the latest posts sent to your email.